I'd get into what took me so long, but that would be a really long, boring post. Instead, I'll just fill you in on the highlights of this past year that I've missed sharing with you all. I graduated from grad school (YAY!), I found a really great man (double YAY!), and I got a big kid job (YAY for paying bills!). All the while, I've been thinking about you, my dear readers, and wanting to bake something pretty and delicious for you, but just couldn't get all the pieces together - mostly because whatever I made was devoured before I could get a picture. And what's a post without a picture??
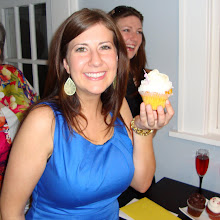
So, I baked a cake for my man's birthday...AND I managed to take pictures, many many pictures. In fact, I could hear tummies grumbling as I snapped away because everyone wanted to eat cake. Who doesn't? But I did this for you. And for this wonderful man, whose birthday we were celebrating.

I love to bake, as I'm sure you all understand, so no occasion can pass without being marked by a delicious treat - and birthdays are certainly no exception. So, I asked my man, "If you could have any flavor cake or cupcake in the world, what would it be?" After some careful consideration, he replied, "Vanilla with Vanilla Swiss Meringue Buttercream because that's the first thing you ever baked while we were dating." He's such a sweetie. But seriously? Not Chocolate Peanut Butter? Or Caramel Swiss Meringue Buttercream? Or Nutella Swiss Meringue Buttercream (my all time favorite)? Well, if that's not a challenge to find the best Vanilla cake recipe, then I don't know what is!
Without further adieu, I bring you Vanilla Bean Birthday Cake...

Vanilla Bean Birthday Cake
{Source: Cake and Swiss Meringue Buttercream from Sweetapolita}
Vanilla Bean Cake
Layers
Yield: three 8-inch round layers
Ingredients:
1 1/2 cups (3 sticks,
341 g) unsalted butter, at room temperature (on counter apprx 20
minutes)
2 2/3 cups (540 g) granulated sugar
9 (275 g) egg whites, at room temperature
4 1/2 cups (630 g) all-purpose flour
2 tablespoons (22 g) baking powder
1 teaspoon (6 g) salt
2 cups (500 mL) buttermilk
1 tablespoon (15 mL) Nielsen-Massey Vanilla Bean Paste - 4
oz, OR 1 vanilla bean, split & scraped
1 teaspoon (5 mL) pure vanilla extract
Method:
1. Preheat oven to 350° F.
Butter three 8" x 2" round cake pans, line with parchment
rounds, and dust with flour, tapping out the excess.
2. In a stand mixer fitted with the paddle attachment, beat
the butter and sugar on medium-high speed until lighter in color and slightly
increased in volume, 3 to 5 minutes. Lower the speed to medium and add the egg
whites gradually, mixing until fully incorporated.
3. Sift the flour, baking powder, and salt into a medium
bowl. Mix vanilla extract and vanilla paste (or contents of vanilla bean) into
buttermilk. Alternate dry ingredients
and buttermilk into creamed mixture, beginning and ending with dry ingredients.
Mix until just incorporated or finish by hand gently.
4. Divide the batter evenly between the prepared pans. If
possible, weigh the batter in each cake pan on a digital kitchen scale to
ensure even layers. Smooth with small
offset palette knife, and bake for about 30 minutes, rotating once after 20
minutes. Cake is done when toothpick or skewer comes clean.
5. Let pans cool on wire rack for 10 minutes, then invert
cakes onto racks, gently, peeling away parchment rounds. Let cool completely.
Swiss
Meringue Buttercream
Yield: 7 ½ cups
Ingredients
8 large egg whites (30g each--total 225g, or 1 cups)
2 cups granulated sugar (400g)
2 ½ cups (5 sticks) of unsalted butter, softened but cool,
cut into cubes
1 tablespoon pure vanilla extract (I use Vanilla
Bean Paste)
1/4 tsp salt
Method:
Wipe the bowl of an electric mixer, whisk attachment, small
bowl, and whisk with paper towel and lemon juice (or vinegar), to remove any
trace of grease. Add egg whites and sugar,
and simmer over a pot of water (not boiling), whisking constantly but
gently, until temperature reaches 160 degrees F, or if you don't have a candy
thermometer, until the sugar has completely dissolved and the egg whites are
hot (you can feel a drop in between your fingers to ensure no granules.).
Take off of stove, and place bowl back on electric mixer
fitted with whisk attachment, begin to whip until the mixture is thick, glossy,
and neutral (you can feel outside of the bowl to test temperature). Switch over
to paddle attachment and, while mixing on low speed continously, add butter one
cube at a time until incorporated, and mix until it has reached a silky smooth
texture (if curdles, keep mixing and it will come back to smooth). Add vanilla and salt, mix well. You can also
add a wide variety of flavourings, extracts, and more. If buttercream is too
runny, the butter was possibly too soft--place into the refrigerator for about
15 minutes, then beat again. If still too runny, add a few more cubes of butter
and keep beating. Use immediately, or refrigerate/freeze.
Assembly:
1. Place bottom layer face up on a cake stand, plate, or
thin cake board (on a rotating cake stand, if possible). Spread and smooth ~ 1 cup frosting using a
small palette knife.
2. Repeat step 1 using second cake layer.
3. Gently place third cake layer, face down, on top.
4. Spread a thin layer, also known as a crumb coat, all over
cake using an the offset palette knife for the top and straight palette knife
for the sides (I use Ateco Ultra Palette Knife - Straight - SS/Polypropylene -
10"). Then, using a bench scraper, gently scrape off excess frosting from
the cake, for a smooth finish. This works best while slowly spinning your
rotating cake stand with one hand and holding the bench scraper with the other
(I use this one: Fat Daddios Bench Scraper - Stainless steel). Refrigerate your
cake at this point, for between 30-60 minutes (can be more).
5. Use remaining frosting to decorate your cake. If you want
a smooth finish, you can repeat step 4, but with a thicker layer of frosting.
6. Add sprinkles or any other decorations that make you
happy!

Enjoy!
Xoxo,
Gwyn